Painting a Chair Cushion

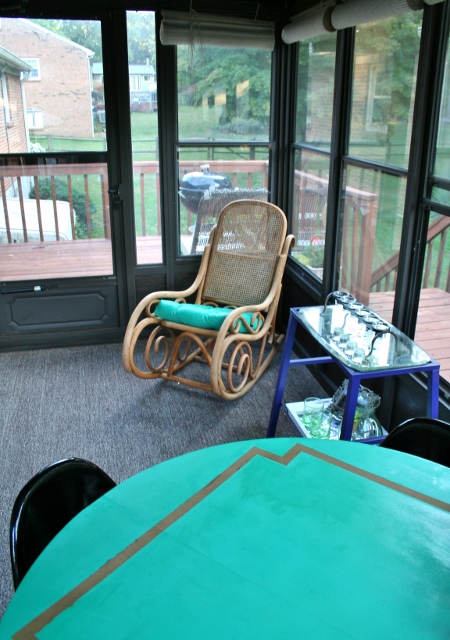
I have a hard time getting rid of anything that is still functional even if it isn’t the prettiest anymore (at least not to me). I think that’s why furniture painting is something that has always intrigued me. I love that it offers an option before the upholstery shop. It sounds a little scary, and I’m was more than a little dubious to attack a sofa with a paint brush so I decided to start small. Small as in this cushion for the rocking chair in the sun room.

painting-upholstery-chair-cushion

painting-upholstery-chair-cushion

painting-upholstery-chair-cushion

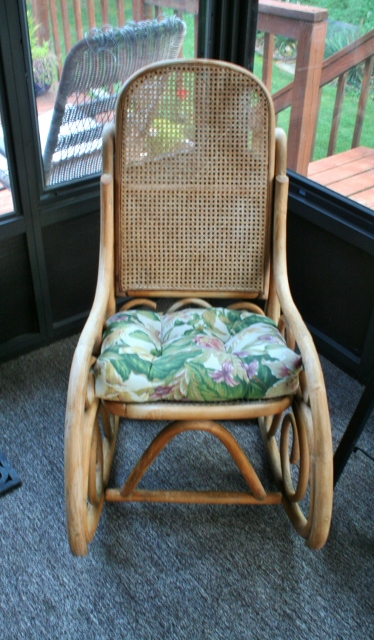
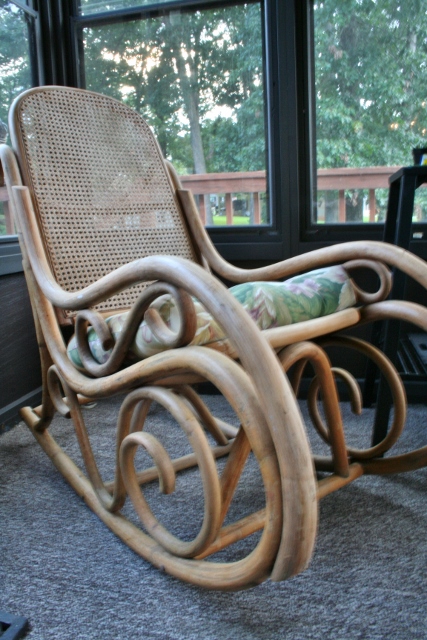
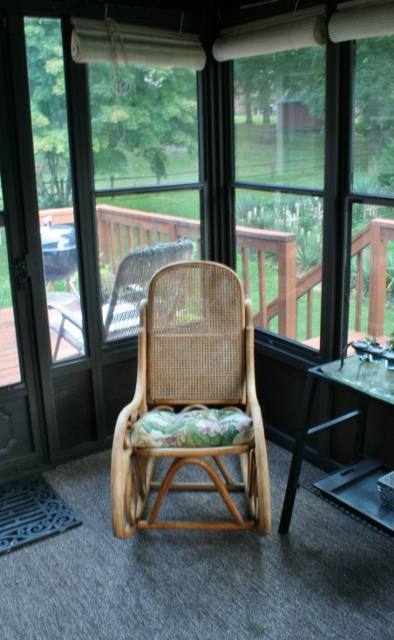
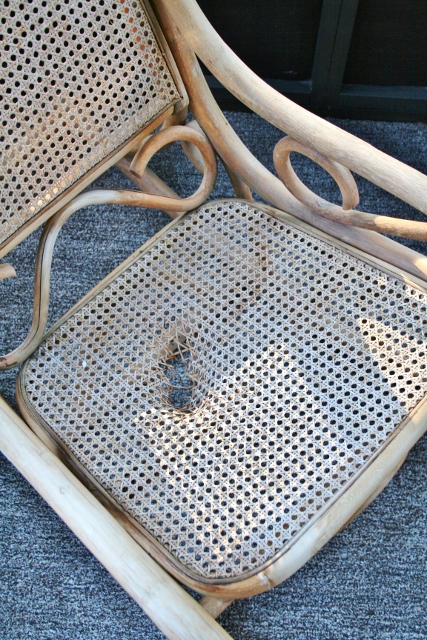
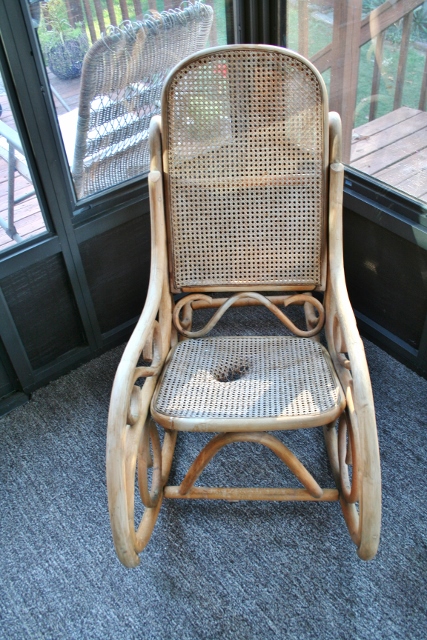
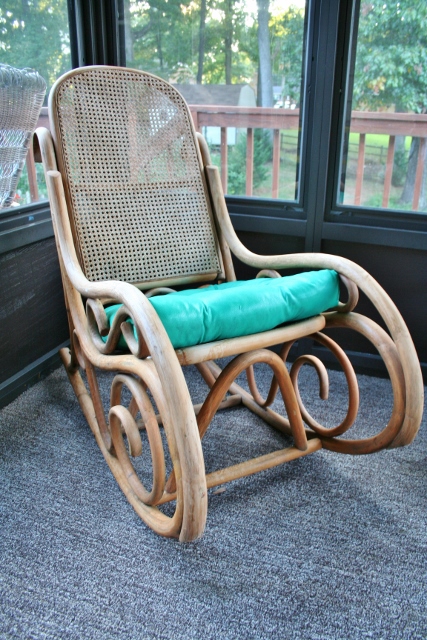
The rocking chair itself is a family hand-me-down which I love. I think it’s great! Unfortunately it had a mishap at one point and the seat looks like it’s trying to flush you out of it.

painting-upholstery-chair-cushion

painting-upholstery-chair-cushion

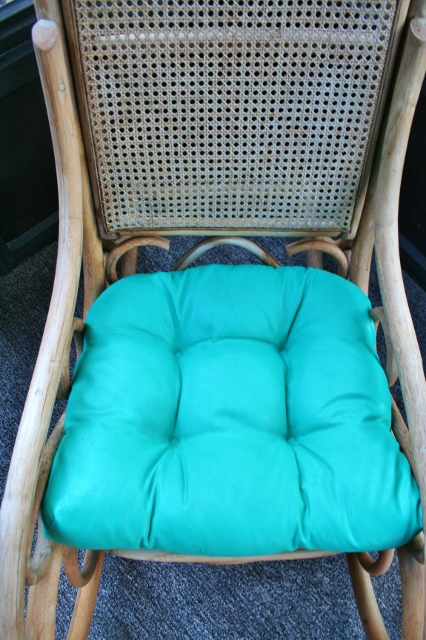
A cushion was then purchased for it and this is how it came to me. The best solution would probably be to recane it (is that what repairing the seat is called?) but it’s so comfy with the cushion so I tried to just make a change to the cushion. I decided to paint it!

Here are the supplies I needed:

  • Foam paint brush
  • Paint (I used Valspar Duramax color matched with Pantone Emerald Green since I had it leftover from the emerald and gold table)
  • Fabric Medium (purchased at a craft store)
  • Measuring cups
  • An empty glass container
  • A spray bottle

painting-upholstery-chair-cushion

The process is very simple. First, mix up your paint mixture. I used a 1:1:1 mixture of paint, fabric medium, and water. I mixed it in an old food glass container since I knew I would need it over the course of a few days as I coated (and recoated) the cushion.

Next, spray down the cushion with water. Then start painting the cushion in thin coats.

painting-upholstery-chair-cushion

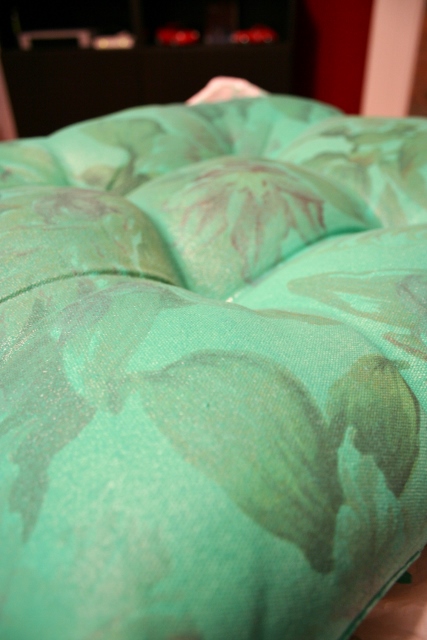
This takes many coats and patience, although it probably varies for each project. Mine had a darker pattern which is probably one of the hardest things to cover up. I can’t even tell you how many coats it took. It took a lot. I would wait at least an hour between coats. Sometimes more depending on my schedule.

painting-upholstery-chair-cushion

Once it is sufficiently coated on both sides you really want to give it time to dry. Like a lot of time. Make sure this is dry before putting it on your furniture!

painting-upholstery-chair-cushion

painting-upholstery-chair-cushion

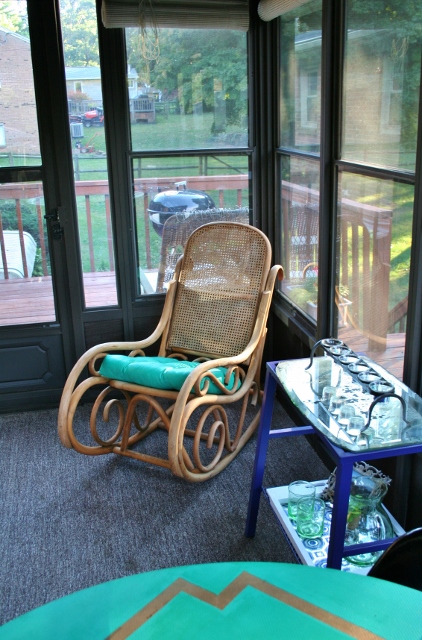
I love how it ties in the green table. I think it looks nice with the wooden rocker.

painting-upholstery-chair-cushion

painting-upholstery-chair-cushion

painting-upholstery-chair-cushion

painting-upholstery-chair-cushion

painting-upholstery-chair-cushion

The cushion had a soft cotton feel to it before it got painted. It definitely feels coarser now, like an outdoor polyester fabric. That really doesn’t bother me since it is probably better this way for outdoor furniture. However, I wouldn’t want this for a comfy living room chair.

Now I know I am going to get questions about what I am going to do with the actual chair. The answer is nothing…for now. As I mentioned before it was given to me by family – meaning, I feel a lot worse about permanently changing it with something like paint. I would probably (although not definitely) paint it in a second if I had just scooped it up at a thrift store but this piece has to go through family approval. It has been approved for stain but I’m not sold. I actually like it light as is, so stain would just make it darker. Although perhaps a nice gray wash stain would look nice? See, I’m rambling off various ideas. So the chair stays as is…for now!

Just to finish off the post, here is the delightful before and after:

painting-upholstery-chair-cushion

painting-upholstery-chair-cushion

From Black to Blue Entertaining Table

One day long ago in the spring I woke up one fine Saturday morning, threw open the shades to a beautiful day and spied a neighbor’s yard sale. Clad in my PJ top and jeans (gosh I’m classy), I gleefully cantered down to their front yard. Time to forage their cast-offs!

This all came home with me (excuse the Instagram picture):

yard-sale-finds

I call that a pretty good yard sale!

The black table lived in the new sun room setup for a while as the other pieces were coming together.

www.rappsodyinrooms.com

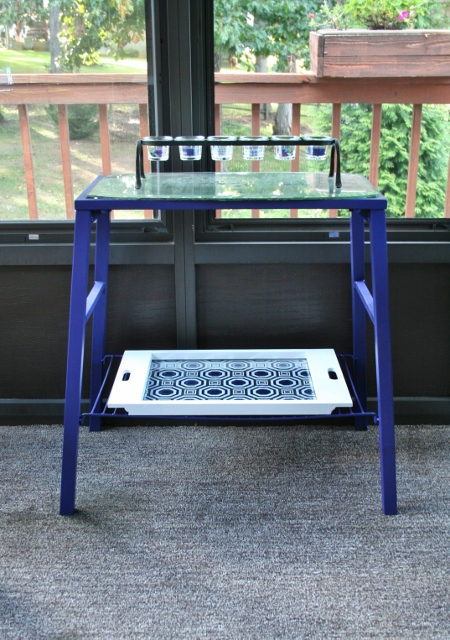
Finally, it was time for the black table to have its time in the limelight. The black was okay in the room but I wanted to bring in more navy (since the back door is navy and the plastic stuffed pillows had navy patterns in them). The other side of the room needed more. Navy it was!

styling-a-side-table

I like it! It’s a fun pop of color and brings the navy all around the room. Yes, sometimes it looks purple but I’m just going with it.

styling-a-side-table

Now time for the fun part – styling! You’ve seen me challenging myself to get better at styling (like when I styled the love seat four different ways and how I styled the yellow grilling cart) so I once again set out to do my styling best.

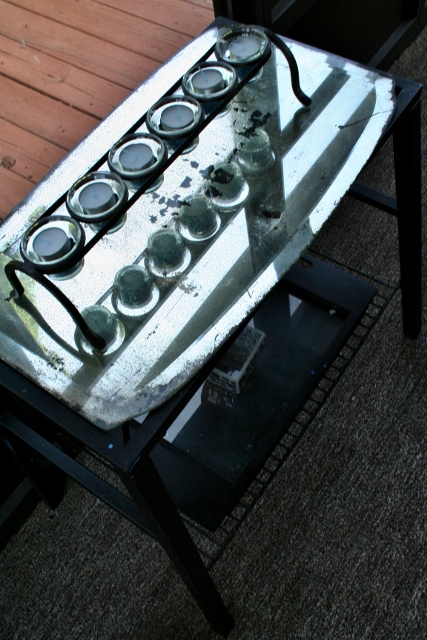
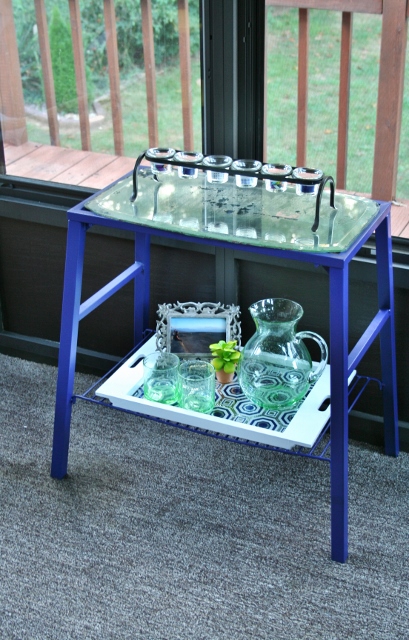
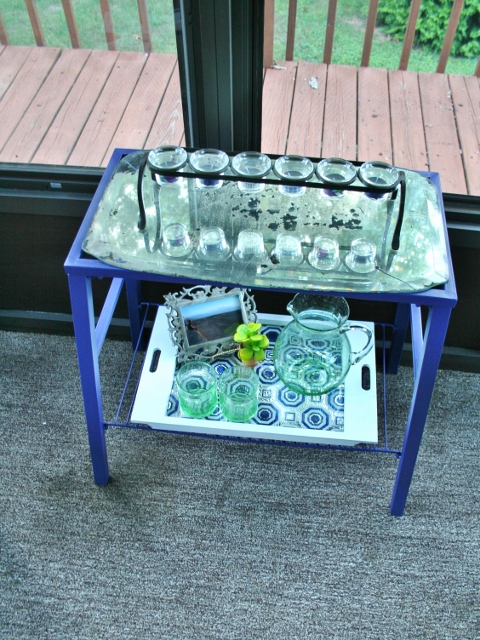
As you saw in my Instagram picture I grabbed an antiqued mirror at the yard sale for the top (although they didn’t come together – I actually grabbed them on separate sides of the yard sale). The washi wrapped votive holder topped that.

styling-a-side-table

styling-a-side-table

Then the salvaged tray was the shelf for the bottom.

styling-a-side-table

This is where I really had fun playing. I see this as an entertaining tray where I can put out drinks and appetizers so I didn’t want to style it too much so it could be flexible for entertaining, but I also couldn’t have a blank space.

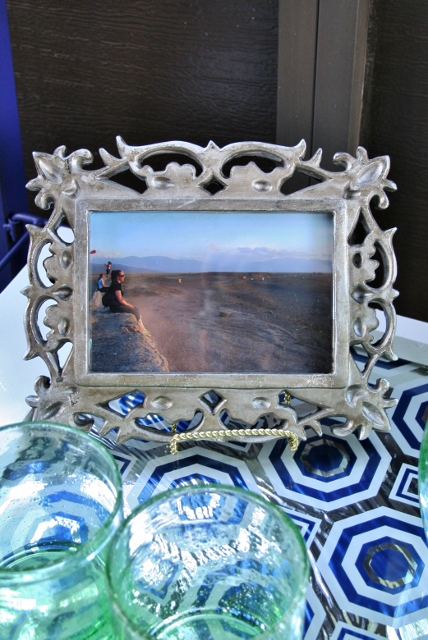
I first raided our kitchen shelves and brought out a beautiful pitcher and glasses we got for our wedding. It’s much better to be able to see them every day instead of having them shut behind closed doors. Then I grabbed a picture and fake succulent to round out the tray.

styling-a-side-table

styling-a-side-table

styling-a-side-table

styling-a-side-table

Now I have a lovely little landing space for drinks to sit and a versatile tray that can move from tray to table to outside for entertaining during the good weather.

Tray Makeover: From Ugly, To Uglier, To Beautiful

You know when you have an image of something in your head and you know it’s just going to be beautiful? Oh the anticipation, the excitement, the delight when you find it! It’s perfect! Is that reality? Not all the time. Nope, definitely not. This, my friends, is a story of a project gone terribly, terribly wrong  (have I emphasized that enough?). Thankfully, there is a happy ending with a great recovery.

It all started with a simple black tray from Goodwill.

tray-transformation

It wasn’t bad as is, but it did have some paint discoloration on it. I knew it could be better. My plan was to have it as the second shelf holder on the black table in the sun room.

www.rappsodyinrooms.com

Perfect right? Except it needed to be prettier. My plan was to draw in the colors of the sun room with the tray. I went all over the color palette of the room trying to decide which color to paint the tray. I ultimately decided I wanted to go yellow.

tray-transformation

tray-transformation

I was pretty happy with the yellow as-is. But I thought it would be fun to bring in even more colors and some geometric shapes. This is where it goes downhill fast.

I used painters tape to randomly tape out a fun little pattern.

tray-transformation

Then I took the remaining sun room colors to fill in the geometric shapes. That way when I pulled away the tape it would be pretty colors with yellow lines surrounding them.

So I got down to crafting. Thankfully good sense surfaced in enough time to yell at me, “STOP!”

tray-transformation

Yup, halfway through I knew there was no salvaging this idea. It literally looked like the worst 80’s craft project gone so wrong. I mean, it was TERRIBLE. I’m not ashamed to say that first and loudest. What was I thinking? It was all wrong – so wrong!

Down went the paint brushes. I tried to rub the paint up with a wet cloth.  Nope, too dry. So I let it dry completely.

Then the failed project failed some more. When I went to pull the paint off the next day it became an even bigger mess. The tape didn’t come up well. It left spots. It pulled up the original black finish. It wouldn’t have worked in the first place. It was bad, people, bad.

tray-transformation

I set to sanding it down in hopes of getting rid of all the paint edges and lines. It sanded down pretty well.

tray-transformation

tray-transformation

I then decided to take it to a manageable base where I could reimagine the project. On went the white spray paint.

tray-transformation

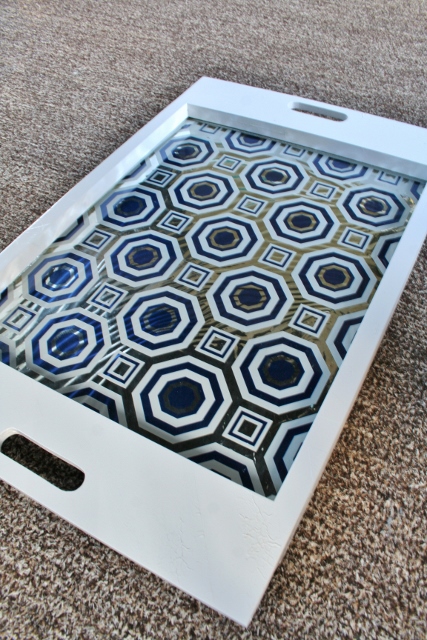
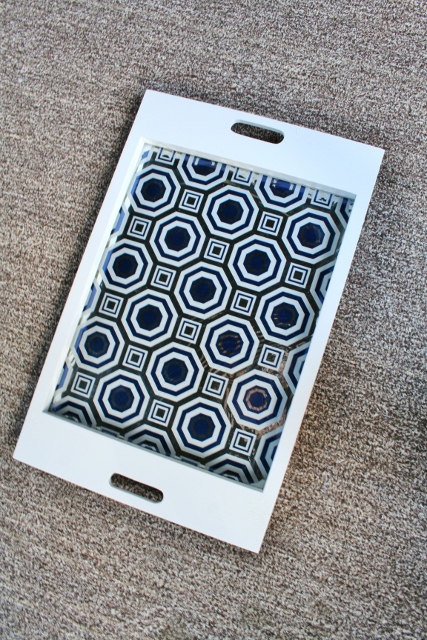
You could still see the geometric lines now but I actually kind of liked that white on white pattern. But it was too much white. So I decided to keep it white and put paper on the bottom.

tray-transformation

I planned to Modge Podge it down (hence the pictures with Modge Podge) but miraculously it had some static cling to it that kept it in place.

tray-transformation

Now this is more like it.

tray-transformation

tray-transformation

I thought this tray was destined for the trash (as it wasn’t even worthy enough to go back to Goodwill) but I am so pleased with how it turned out in the end. Yes, I say that’s a point for the comeback kid. So everyone, the lesson here is to never give up, even if your first idea tanks, there is still room for beauty to emerge!

Styling the Yellow Grill Cart

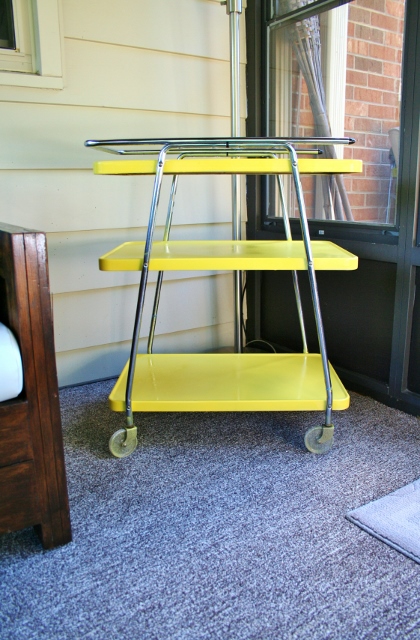
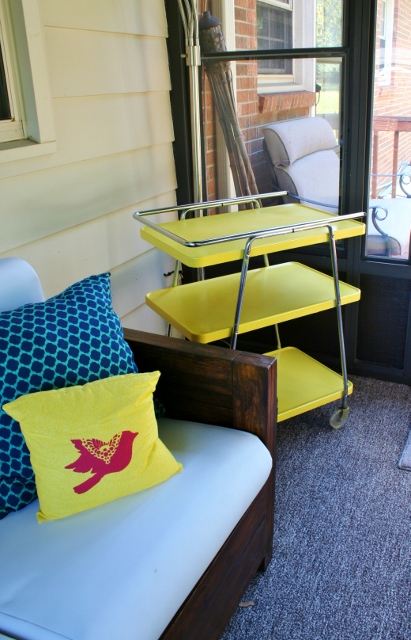
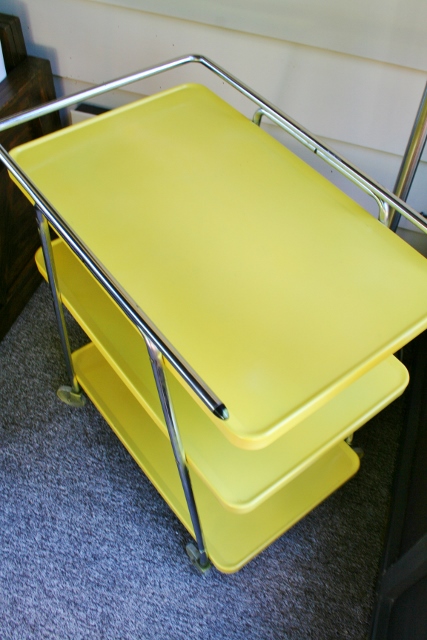
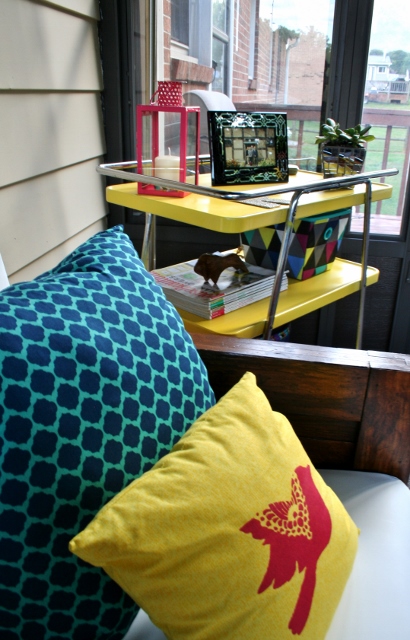
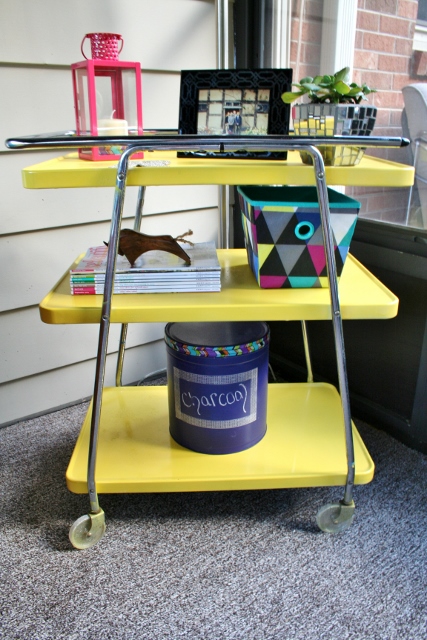
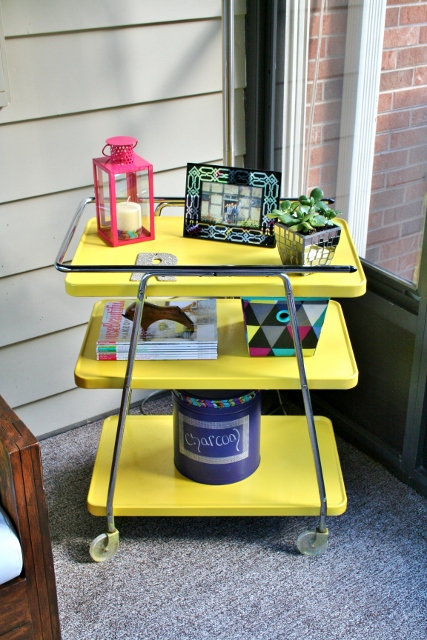
Remember when I bought a pretty little yellow cart at an antique shop earlier this summer? She had pretty retro lines and sparkly wheels and was destined for the sun room.

styling-a-grill-cart

styling-a-grill-cart

styling-a-grill-cart

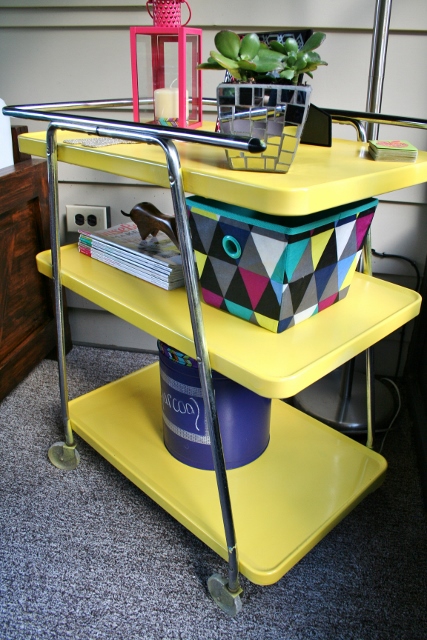
Well she was pretty all on her own but I needed her to pull a little bit more weight. My idea in buying her was for her to have a multi-function job. I saw her working as a side table in the sun room, holding drinking, magazines, and other pretty things. I also saw her as being wheeled out onto the deck when we need a surface for grilling. Then, when I made the charcoal holder from a popcorn tin, I knew that the yellow cart would hold that too.

So I do whenever I start styling something – I gathered a huge pile of possible items to work with.

styling-a-grill-cart

Then I just start playing with what looks good, all while keeping in mind what I saw the car functioning as. After a little while I hit upon a pretty and functional style that sat well with me. So much that I sat in my loveseat and just stared at it smiling. I know when that happens that it works.

styling-a-grill-cart

styling-a-grill-cart

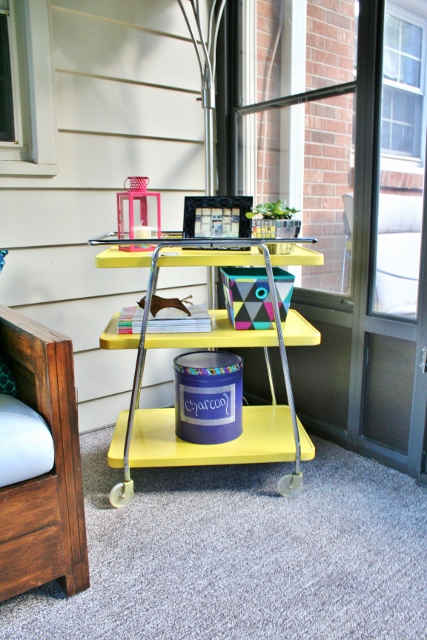
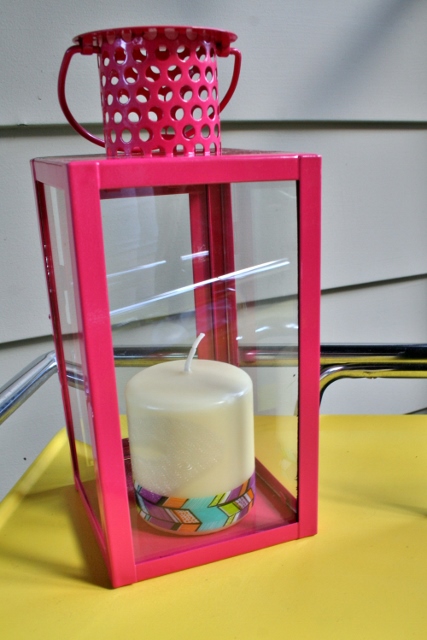
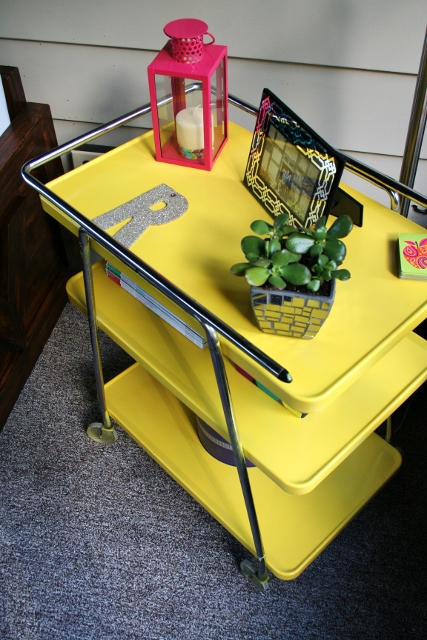
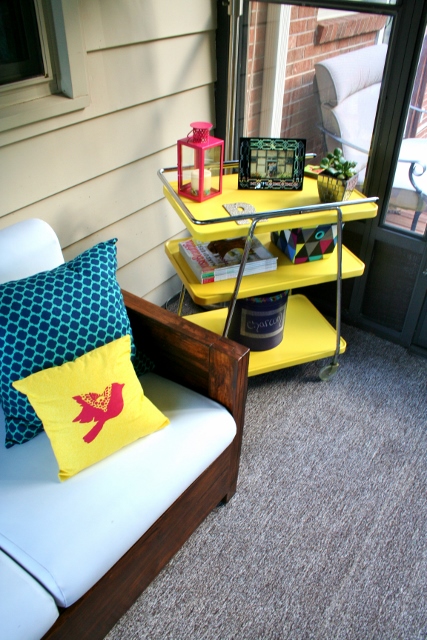
The first shelf holds a lantern (from the clearance section in Michael’s) with a Dollar Store candle that I wrapped washi tape around to dress up.

styling-a-grill-cart

styling-a-grill-cart

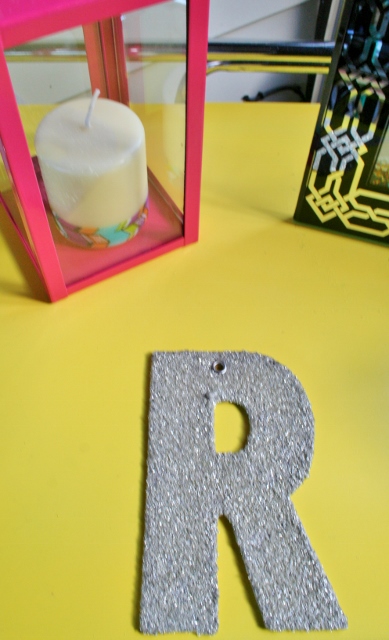
The “R” was also from the clearance section in Michael’s. I wanted a coaster for the cart so I decided to Modge Podge the “R” and use that as a coaster.

styling-a-grill-cart

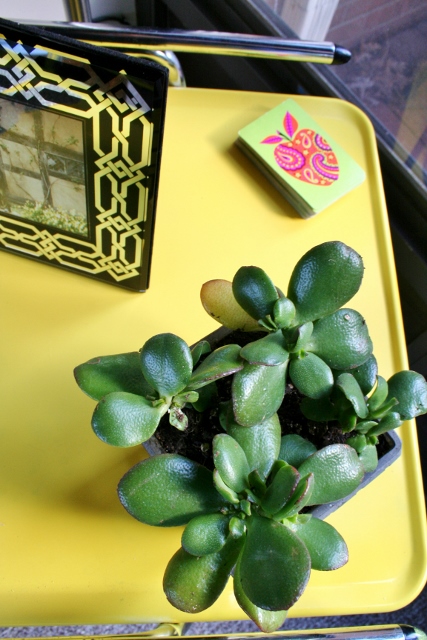
The frame was $0.45 at a local thrift store. I really dove into the archives for the family picture from the 90’s. It was my first trip out of the country. The whole family went to England and Scotland. Ah the fashion and hair in this picture. Amazing.

The succulent pot was from a yard sale with a clearance succulent from Lowe’s.

styling-a-grill-cart

The middle is a stack of magazines for easy reading while lounging on the love seat. The wooden buffalo was a thrift store treasure that I fell in love with immediately.

styling-a-grill-cart

styling-a-grill-cart

styling-a-grill-cart

styling-a-grill-cart

The geometric bin was a $1 find at Wal-Mart of all places. It’s empty right now but I’m thinking it will hold napkins for parties out there. The colors were just so perfect for the room (and they were such a good deal I bought $4…not sure where they are going to go).

styling-a-grill-cart

The last shelf holds the charcoal container.

styling-a-grill-cart

styling-a-grill-cart

styling-a-grill-cart

There it is, my styled yellow cart! I’m working on paring things down and not over styling. I like that there are interesting items on the cart but it’s not too much. Do you have any styling tricks?

Sharing This Post Here:

Singing the Navy Blues for the Sun Room Door

Summer has basically come and gone but darn it, I’m going to finish the sun room before winter is here. Thankfully, Virginia falls are probably among the best out there. Bye bye humidity – hello perfect 70 degree weather. This also makes it perfect sun room sitting weather since sometimes the weather in the summer would melt your eye balls. So I will continue chipping away at my sun room projects as long as I can get away with it.

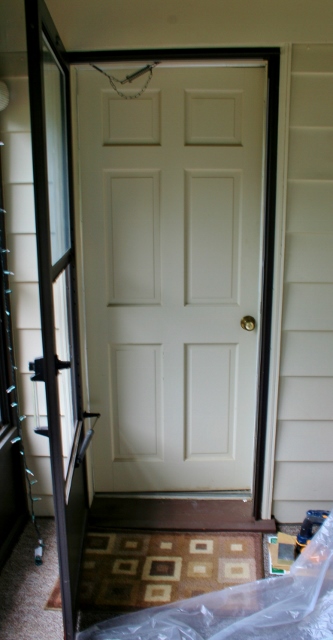
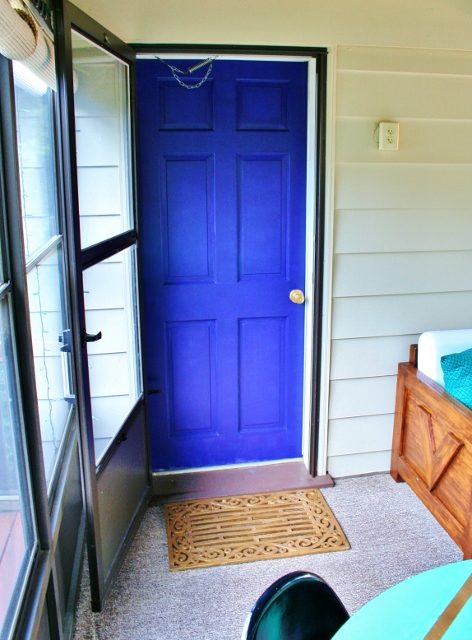
This next project was an easy one that added a bold pop of color (since clearly it is lacking color – hah!). It was time to paint the door (which I primed here and gilded the door knob here).

www.rappsodyinrooms.com

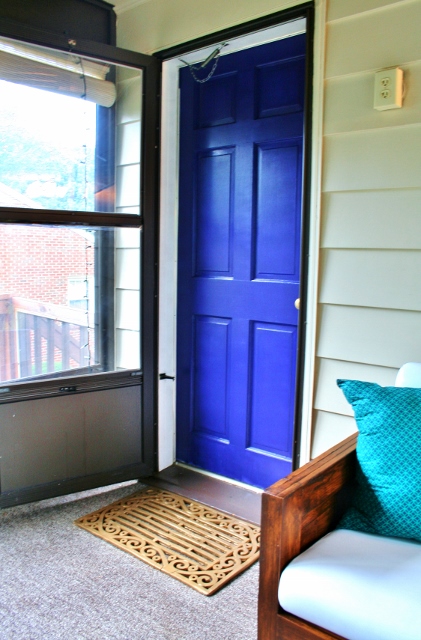
I decided to pick Pantone’s Navy Blue from my pre-planned color scheme. Since it’s an outdoor space I had to get it color matched in Valspar’s Duramax. I used my tried and true door painting method o freshen up the door.

painting-back-door-pantone-navy-blue

painting-back-door-pantone-navy-blue

painting-back-door-pantone-navy-blue

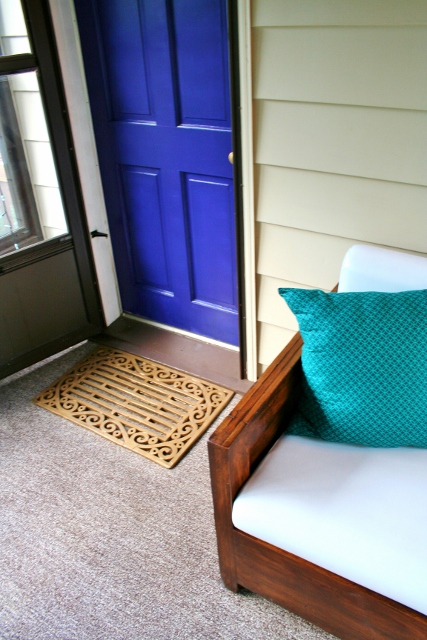
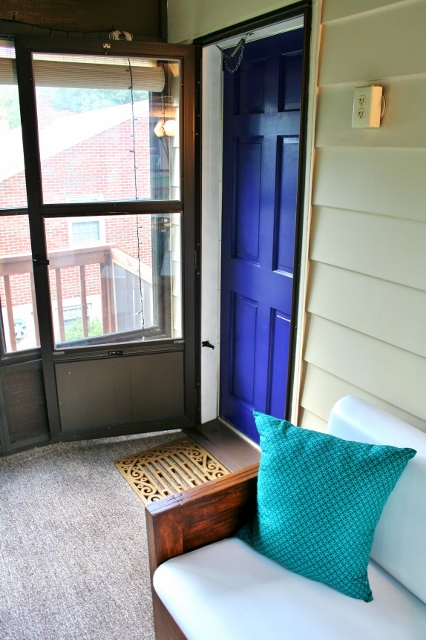
I love how the navy blue looks in both the sun room and Mego Cave (for when the door is open). I wanted to factor that into the equation since I like to keep that door open when I work in there to add a bit more light to the room. Also, I can stare at my pretty little emerald and gold table while I daydream work at my desk.

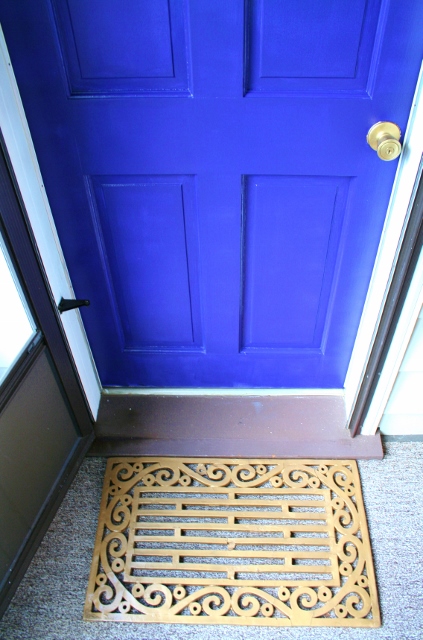
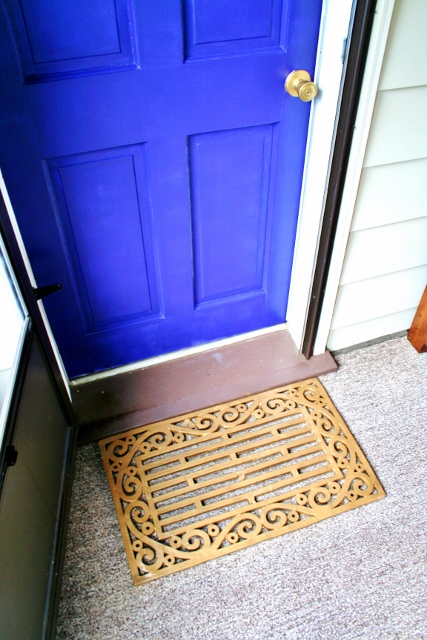
Before we move on from this project, you will notice a “new” little doormat in front of the door. Actually it is quite an old door mat that I bought at an estate store.

painting-back-door-pantone-navy-blue

I originally thought I was going to use it as artwork but all of a sudden I got the urge to paint it gold. So a few quick coats later I had a golden door mat (as cool as the golden ticket in my mind).

painting-back-door-pantone-navy-blue

painting-back-door-pantone-navy-blue

I like how it brings together the door knob and mat while also picking up the gold in the emerald and gold table.

painting-back-door-pantone-navy-blue

painting-back-door-pantone-navy-blue

painting-back-door-pantone-navy-blue

painting-back-door-pantone-navy-blueBut that’s not all the navy blues I have…no the blues will continue throughout the sun room with a few other painting projects I have up my sleeves!

How to Stencil a Pillow

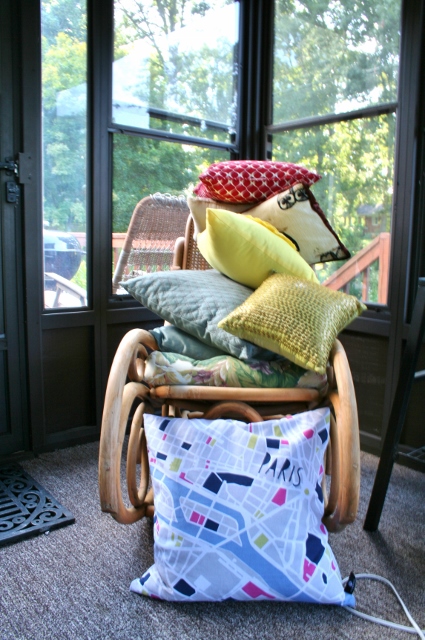
I am in a frenzy of pillow making apparently. I shared earlier how I made pillows stuffed with plastic grocery bags and styled them on the love seat.

making-pillows-with-plastic-bag-stuffing

But it needed more, more! The answer came in basically free stuff again (YAY!). It started when I won a year’s worth of toilet paper. In the spa basket I got there was a delightful little pillow.

cottonelle-spa-package

Bam. I knew it had a future home in the sun room. So I whipped off that cover and promptly sewed another one up, using leftover yellow fabric I had on hand.making-pillows-with-plastic-bag-stuffing

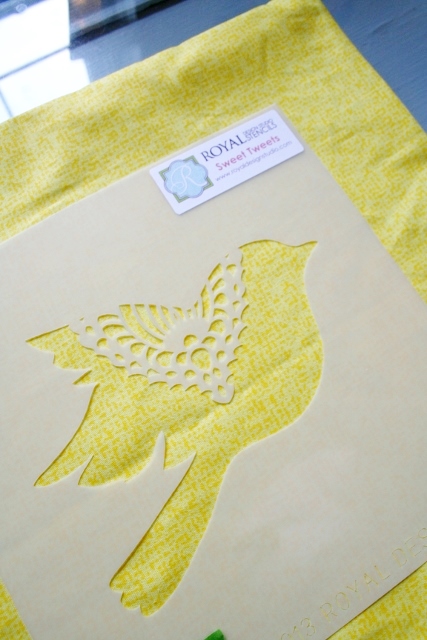
The yellow was bright and fun (and went with my pre-planned color scheme) but I thought it could us a little livening up. Enter a free stencil I got at Haven from Royal Design Studio. It’s a cute little lace adorned bird.

how-to-stencil-a-pillow

Here’s how I stenciled the pillow:

Supplies

  • Pillow case
  • Stencil
  • Stencil brush (I got mine at Michael’s in a big pack)
  • Fabric Medium (Martha Stewart’s – also from Michael’s)
  • Plastic bag
  • Paint (acrylic or latex – I used the exterior latex paint I have left over from a project I will be sharing with you soon!)
  • Tape

1. Place the plastic bag in between the two sides of the fabric. You don’t want any bleeding through!

2. Tape your stencil on the fabric so it doesn’t move around.

how-to-stencil-a-pillow

3. Mix up your paint. My fabric medium specified using one part fabric medium to every one part of paint.

4. Grab your stencil brush and get to dabbing. Make sure you keep a pretty small amount of paint on the brush. Too much and it bleeds (geesh, I should listen to myself more since mine bled just a little bit). I feel like I should have this method down since my mother was a professional stenciler when I was little. I remember she would sometimes bring me to client’s houses while she would stencil their walls (this was the 90s when it was all the rage to do borders). Hers would have layers and multiple colors that were just gorgeous. She really should be writing this post. Anyways, make sure you have a small amount on the brush and then just lightly pound the brush up and down on the stencil.

how-to-stencil-a-pillow

5. Once your area in the stencil is completely filled in you can immediately pull up your stencil. I’m all about these instant gratification projects!

how-to-stencil-a-pillow

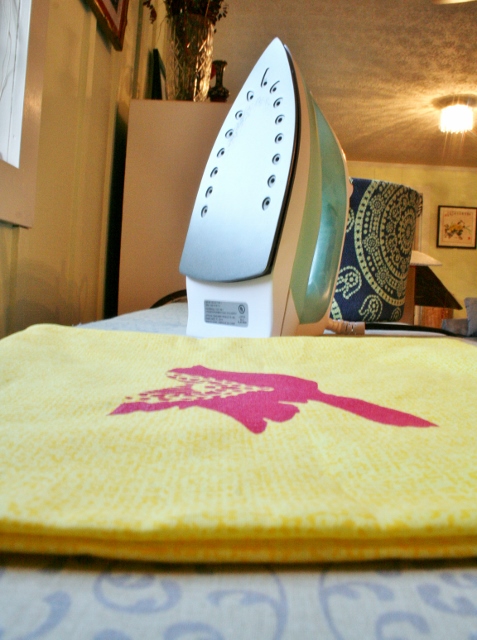
6. Next, per my fabric medium’s instructions (haha, I just pictured a medium – like fortune teller – guiding me through this) I ironed the stencil to set it.

how-to-stencil-a-pillow

7. Then, stuff the pillow form in and stitch it up.

how-to-stencil-a-pillow

how-to-stencil-a-pillow

how-to-stencil-a-pillow

how-to-stencil-a-pillow

how-to-stencil-a-pillow

how-to-stencil-a-pillow

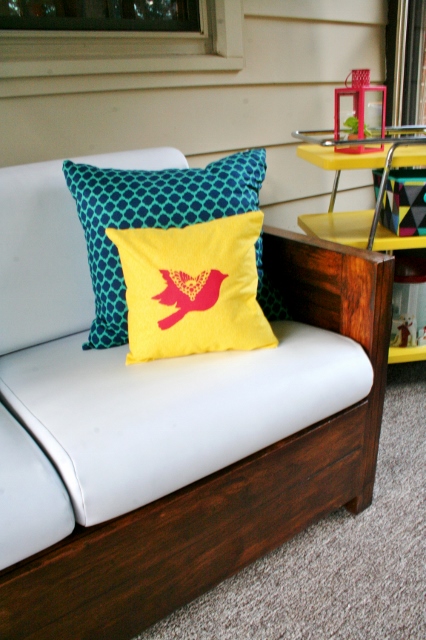
Now I have a fun pillow that is two sides – stenciled when I’m feel sassy and plain if I need it more relaxed. Gosh darn it, I love that pillows have two sides to play with. My goodness, is the love seat project over now? Well, it is until I feel the urge to change the pillows again or add a lovely throw…and you know that’s going to happen!

Sharing this post:

How to Make Beautiful Throw Pillows with Plastic Bag Filling

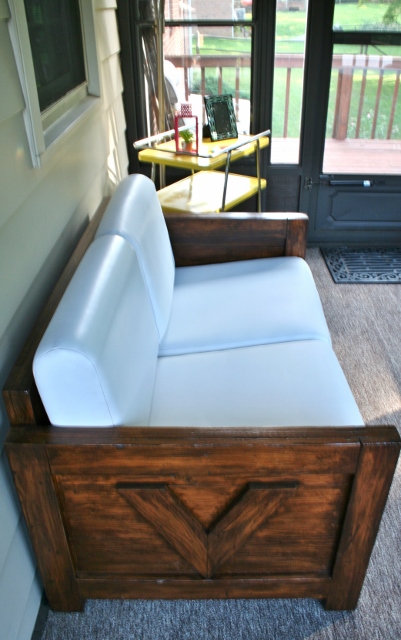
One of my favorite projects to date has been my cargo love seat makeover. I bought this baby off of Craigslist for $40, sanded him down and restained him, and then spray painted the vinyl seat covers.

spray-painting-vinyl-cushions-dupli-color

He was looking mighty, mighty fine (although no need to be jealous Eric) but needed a little styling. You saw me work what I had in the house and tried styling him four different ways.

styling-four-ways

That sure was fun but I still had a few styling tricks up my sleeves…like making pillows in fun and interesting ways. Here’s how my pillow making went down.

It started pretty typical:

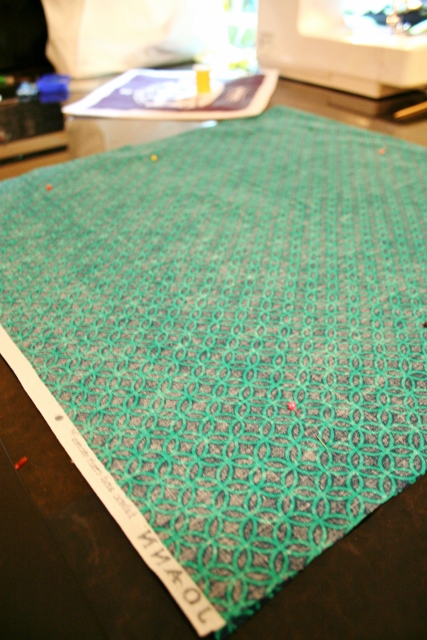
  1. Pick out fabric.

making-pillows-with-plastic-bag-stuffing

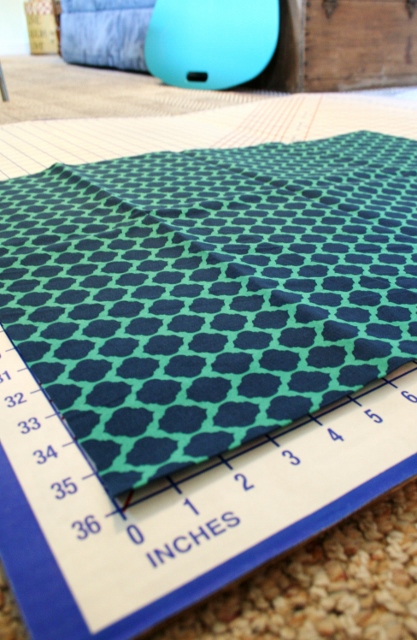
2. Cut out fabric (plus an inch around for hemming).

making-pillows-with-plastic-bag-stuffing

making-pillows-with-plastic-bag-stuffing

3. Pin fabric sides to each other. Make sure you sew the pillow inside out.

making-pillows-with-plastic-bag-stuffing

4. Sew fabric. Yup, I sewed again all thanks to my mother-in-law.

making-pillows-with-plastic-bag-stuffing

Here are some tips and tricks I picked up in sewing pillows.

  • Crisp corners can be a breeze. Just get to where you want to end, make sure the needle is down, lift up the lever, and twist the fabric so you are ready to sew your next straight edge.
  • After you finish sewing, cut away excess material around the edges (not too close!) and snip off the corners on the diagonal.
  • When you flip your fabric back to the correct side, there is a nifty little tool made for corners to help them be crisp. I asked, “Is that a for real tool or just a chop stick?” Apparently it’s legit but I think a chop stick would work well.

making-pillows-with-plastic-bag-stuffing

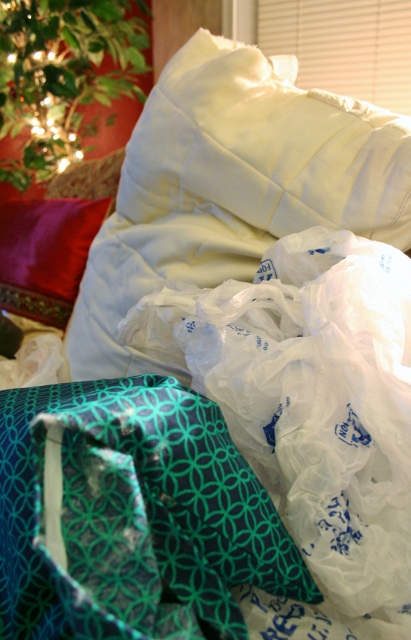
5. Then I got to the stuffing. There are so many ways to stuff a pillow. You can buy a pillow form or recover a pillow you’re not loving any more. Or you could buy a big bag of that stuffing that is pretty expensive at craft stores. Or you could do what I ended up doing. I took an old sleeping pillow that had seen better days and all of the plastic grocery bags I could get my hands on (from my stash, my mother-in-laws, and my co-workers).

making-pillows-with-plastic-bag-stuffing

I used the pillow stuffing for the corners. Then, I stuffed in the plastic bags. Make sure to stuff in a lot since there will be some air in the bags. You don’t want your pillow to deflate later. Once your pillow is pretty packed with bags, use the pillow filling to soften up the pillow. I just did a layer between the fabric and bags.

This is what it looks like in process. It’s fun and messy. I cuddled up on the couch while watching TV one night.

making-pillows-with-plastic-bag-stuffing

6. Sew up the opening by hand.

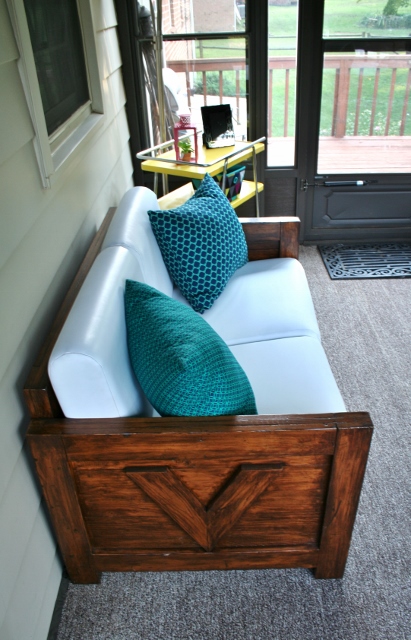
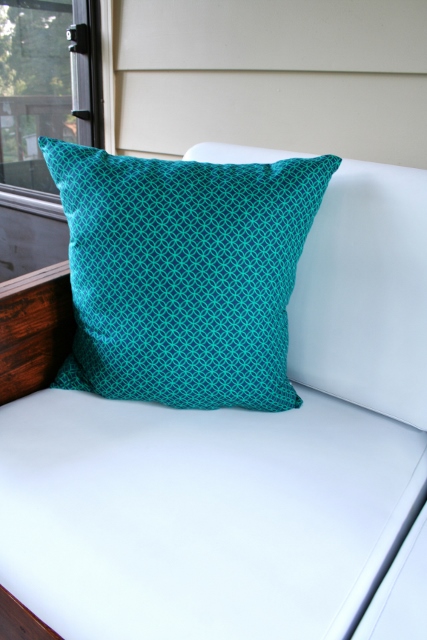
There you go – sew so easy! And almost free as I just paid about $4 for each pillow’s fabric. I thought it would be the perfect way to make outdoor pillows that go through many seasons. Here they are all beautiful on the love seat. I’m so pleased with them!

making-pillows-with-plastic-bag-stuffing

making-pillows-with-plastic-bag-stuffing

making-pillows-with-plastic-bag-stuffing

making-pillows-with-plastic-bag-stuffing

making-pillows-with-plastic-bag-stuffing

making-pillows-with-plastic-bag-stuffing

Sharing this post with:

Use What You Have Styling Challenge Love Seat Edition

I’m trying to up my styling game. Yes, it really is a game to me. I like to play with my house, don’t you? I love what happens when you move your own stuff around (read: no money was spent in the making of this post). It makes your old stuff look new! I decided to give it a try with my newly refinished cargo love seat, especially now that it has oh-so-pretty white vinyl seats.

spray-painting-vinyl-cushions-dupli-color

Full disclosure, I was doing this for the styling practice and knew that everything was going to go back whence it came. But it sure was fun – and good practice (yeah, cause styling takes practice but looks so easy by the pros)! However, I don’t know if it was more fun to actual style the love seat or to go around the house collecting a myriad of blankets, pillows, magazines, and mugs while getting the weirdest “What are you doing?!” looks from Eric (he doesn’t even ask anymore…just rolls with it).

use-what-you-have-styling-love-seat

use-what-you-have-styling-love-seat

So here are the results of my shop the house styling session for the cargo love seat.

Option #1: Beachy Cool

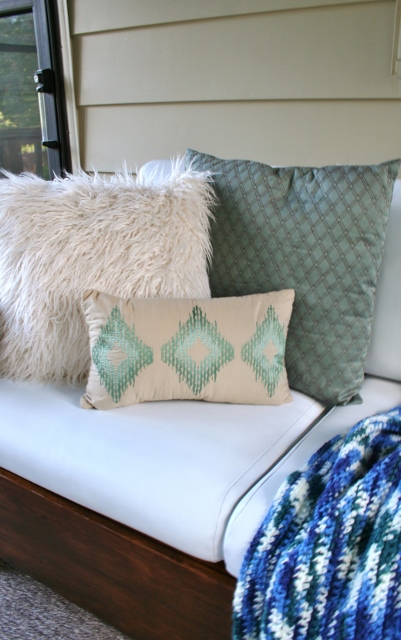
Using cool blues and whites creates a sense of the ocean and beach. Different textures make the room layered and relaxed feeling. I’m ready to cuddle up with a book and stare at the rolling waves (I wish!).

use-what-you-have-styling-love-seat

use-what-you-have-styling-love-seat

use-what-you-have-styling-love-seat

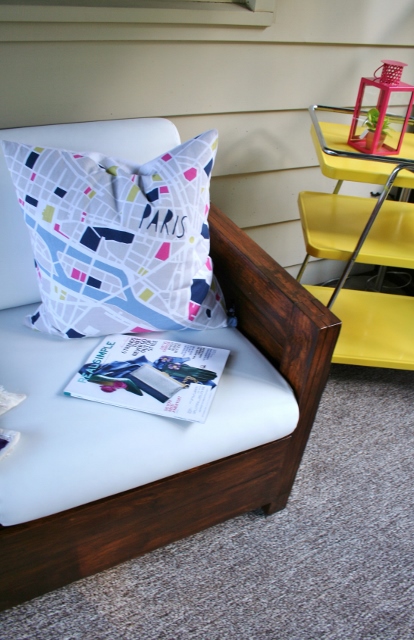
Option #2: Simplistic Preppy

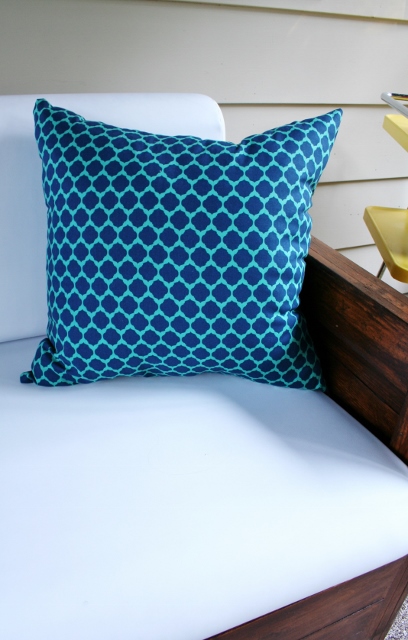
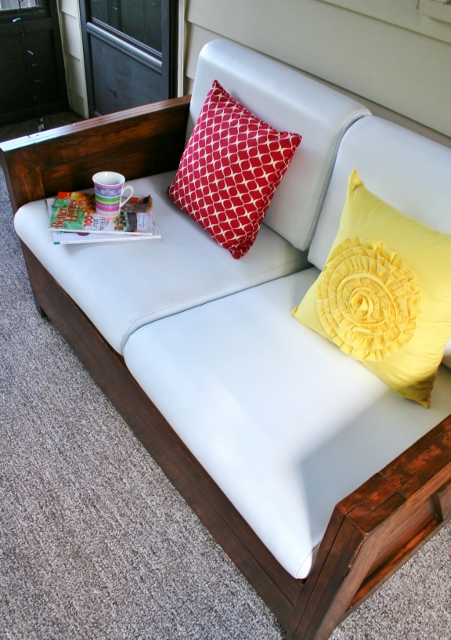
Bright colors with distinct patterns and limited styling makes this pop. Perfect for a perusal of a mag and a cup of tea!

use-what-you-have-styling-love-seat

use-what-you-have-styling-love-seat

use-what-you-have-styling-love-seat

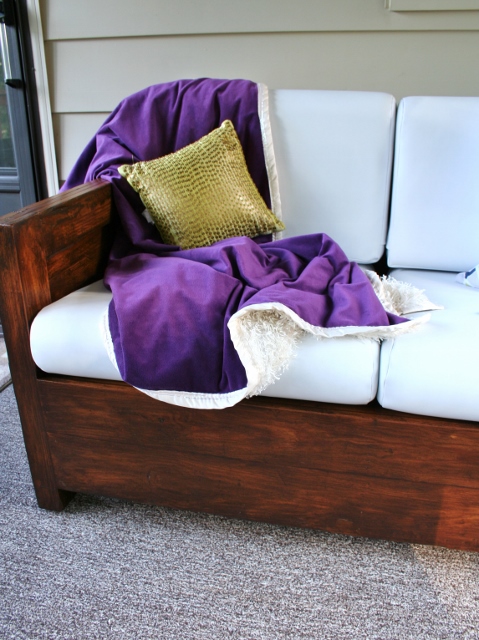
Option #3: Bohemian Cozy

Funky colors, sequins, and fuzzy textures makes this relaxed and free but still inviting.

use-what-you-have-styling-love-seat

use-what-you-have-styling-love-seat

use-what-you-have-styling-love-seat

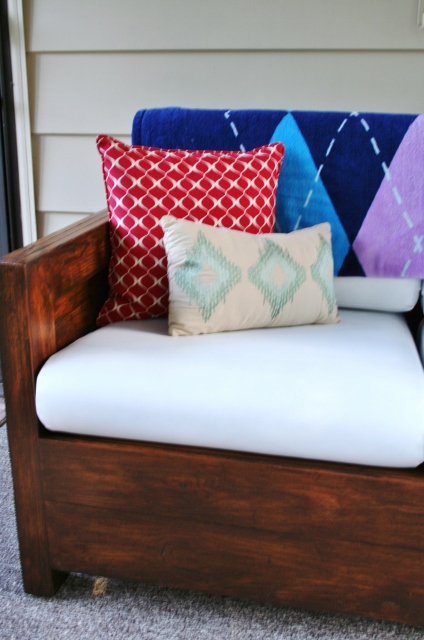
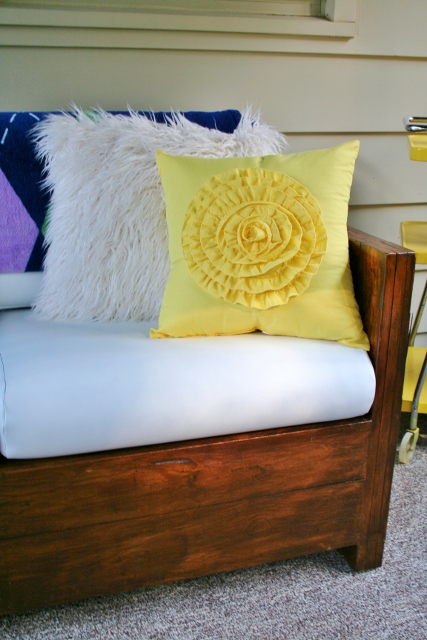
Option #4: Funky Flavor

Layers, layers, layers, playing with different combinations of colors and textures. It’s different and bold. Perhaps not for everyone but isn’t that what styling is all about – what you like?!

use-what-you-have-styling-love-seat

use-what-you-have-styling-love-seat

use-what-you-have-styling-love-seat

Spray Painting Vinyl Cushions

I’m back with another installment in our sun room makeover. This is probably one of my favorite rooms  I’ve ever done. I’m having fun trying all sorts of things, like making a room plan, staining a cargo love seat, painting a table in golden and geometric patterns, and rub ‘n buffing chairs. It’s been a whirlwind that’s just going to keep on trucking. The new project I tried out this time was spray painting vinyl cushions. As you remember, the cargo loveseat came to me all rough and ready for a makeover.

sun room furniture before

Then it got a little makeover…

staining-a-love-seat

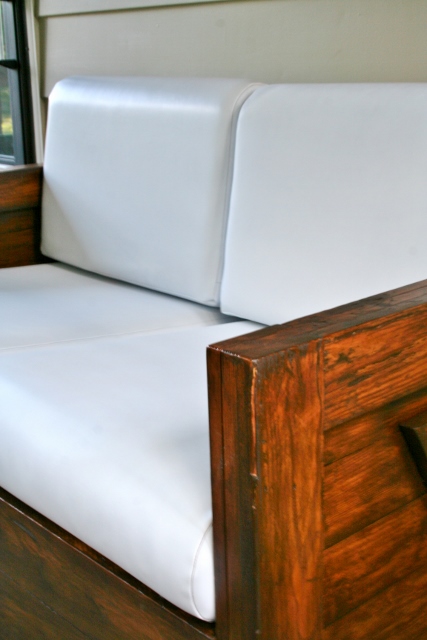
It was looking quite charming with its new dark stain, but it just made the brown vinyl cushions look even more blah. They just faded into the love seat. I was never a fan of the color to begin with and always knew that I was going to change them. Originally I was just going to recover them with fabric, but when I saw how great a condition they were in and what a great material they were for an indoor/outdoor room, I just knew I had to try something different. Enter, Dupli-Color Vinyl and Fabric spray paint (found at an auto store near you – I cleaned out the meager supply in 3 stores!).

spray-painting-vinyl-cushions-dupli-color

The first and only step in readying these seats was to clean them. I scrubbed them with a microfiber and rubbing alcohol (my go-to method of cleaning just about anything). Then, after shake-shake-shaking the can for a minute, I started to spray.

Now I could go and say, hooray! That’s all it took, which is technically true. However, the spray painting method was a little different. This type of spray paint is the finest I have ever seen. When I did an initial pass over the seat cushions, it was like the paint had barely touched them.

spray-painting-vinyl-cushions-dupli-color

Here is the best method I found for spraying these cushions:

  1. Hold the can 4-6 inches from item (this is slightly closer than they recommend on the can but I found it got the best coverage).
  2. Always start spraying off the item. This is always true for spray painting but especially true for this paint.
  3. Do slow, even passes with the can. Not super slow but slower than (at least my) spray painting technique.
  4. You are going to have to make a lot of passes/coats to get the item fully covered in this spray. However, I found that you can do it all in one sitting. The paint dries SO fast. I would do a coat on one cushion and then the other and just alternate back and forth until each side was fully covered.
  5. The item has a fast dry time but leave it outside as long as possible. I found this paint to be VERY smelly and even irritating to my eyes. Only use it outside and I recommend using a mask and eye gear. It’s not cute but it’s safe.

After it’s all sprayed and dry, it’s an amazing finish. It’s like the original finish. I don’t think anyone ever could guess that these seats hadn’t been white forever!

spray-painting-vinyl-cushions-dupli-color

Now, here it is all put together. I’m giddy with delight!

spray-painting-vinyl-cushions-dupli-color

spray-painting-vinyl-cushions-dupli-color

spray-painting-vinyl-cushions-dupli-color

spray-painting-vinyl-cushions-dupli-color

spray-painting-vinyl-cushions-dupli-color

This is definitely a win for spray painting vinyl cushions. These seats have had many bum tests with no scratches or paint coming up. However, dirt has gotten on them and it just wipes clean (with the paint staying on the seat). Now these cushions just need a little bit of styling, eh? Working on it!

Now, as a grand finale, the always beloved before and after:
sun room furniture before

spray-painting-vinyl-cushions-dupli-color

Sharing This Project:

Painting a Laminate Dining Table Emerald and Gold

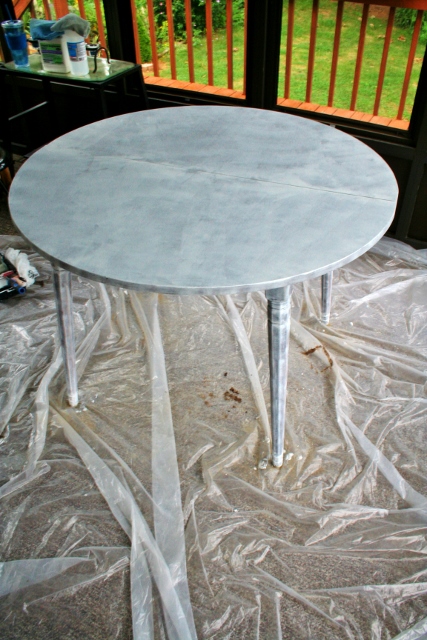
I’m back at you with a post about how I actually finished the table that you saw me prep and prime earlier. Now that the tedious prep work is done, I can now move on to the fun part – picking the perfect paint and patterns! This is where we left off with the table:

priming-laminate-furniture

As you saw in my planning of the sun room, I had picked a palette that included emerald green (Pantone’s pick as color of the year and all-around just one of my favorite colors).

emerald-green-pantone

Source

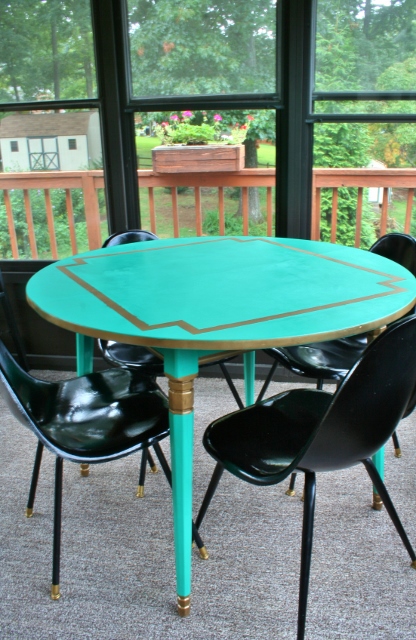
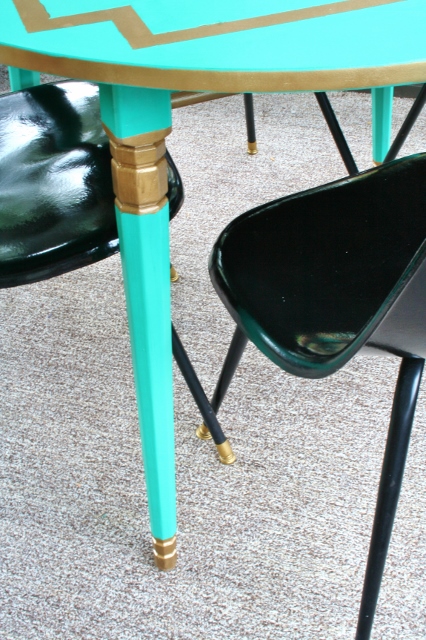
I knew this was the bold, beautiful color that I wanted to paint the table. Then, inspired by my gilded chair legs, I decided that an emerald and gold would be the perfect combination.

www.rappsodyinrooms.com

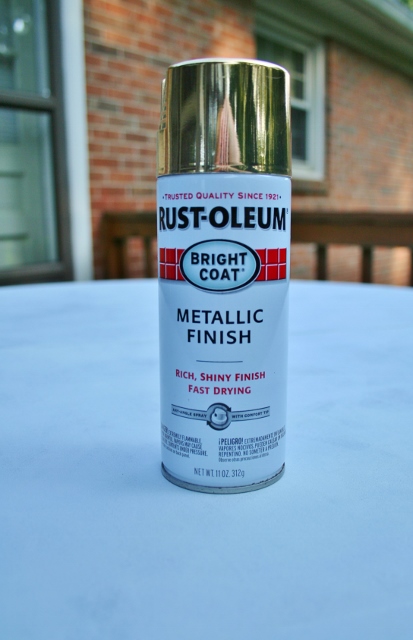
I had originally thought that I was going to use the Rub ‘n Buff for the gold inlay on the table but after I realized I wanted more gold on the table than just the legs, I needed something that would go a little farther. I also wanted a paint that was a little more durable for an outdoor dining table. I went with Rust-oleum’s gold metallic spray paint.

painting-laminate-furniture-emerald-green-pantone

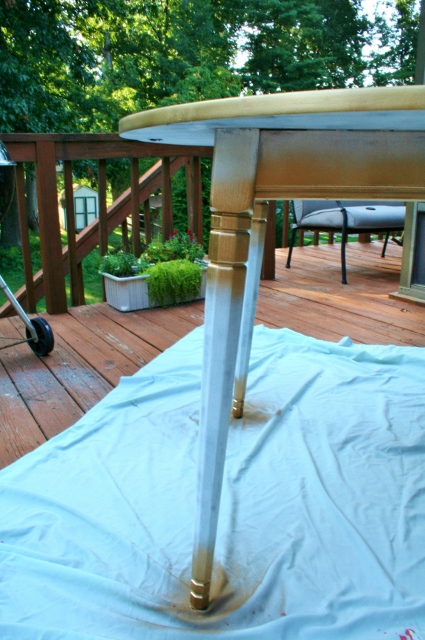
I then hauled the table out to the deck (in a mad dash between thunderstorms) and sprayed it gold in the areas I knew I wanted to have a gold pattern.

painting-laminate-furniture-emerald-green-pantone

painting-laminate-furniture-emerald-green-pantone

Then, just to reinforce the gold (since I knew I was going to be taping over it) I put a coat of Valspar’s clean protective coating (in spray paint form). I crossed my fingers this would keep the paint on the table and not pull up with the paint later on.

painting-laminate-furniture-emerald-green-pantone

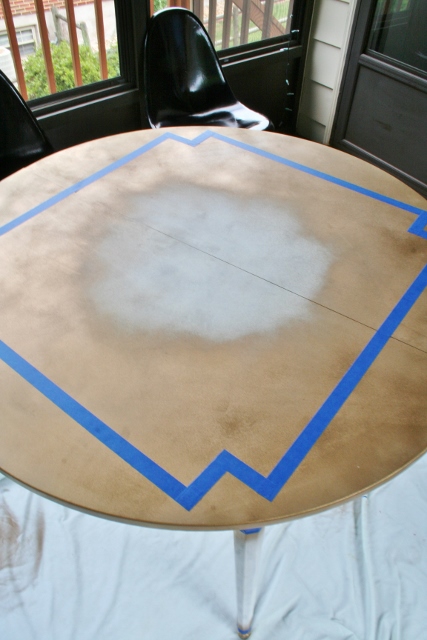
After letting that dry overnight I taped out a pattern on the table.

painting-laminate-furniture-emerald-green-pantone

painting-laminate-furniture-emerald-green-pantone

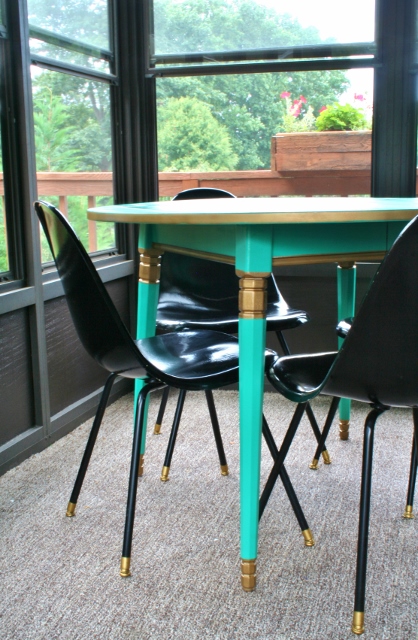
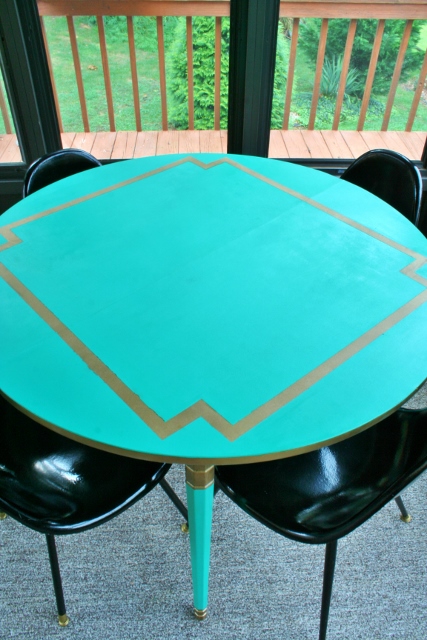
I wanted to have a little pop of fun on the top and then have gold sections on the legs.

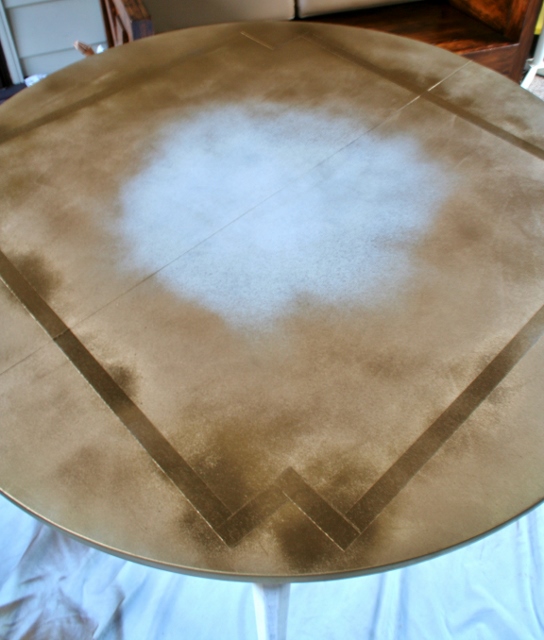
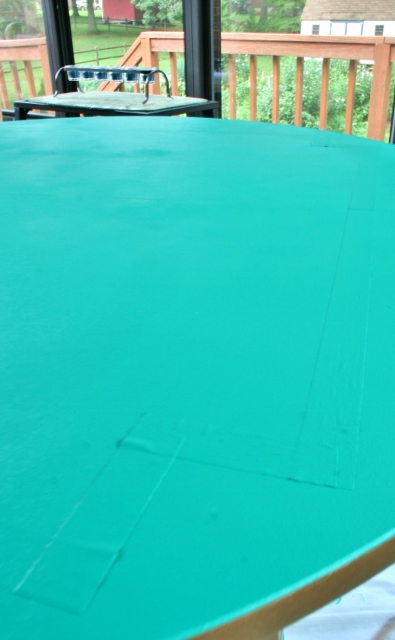
After I taped that out I realized (after some major encouraging from Eric) that I needed to do it right, so the table got hauled onto the porch again and another coat of gold spray paint was put on over the taped lines. This is key to achieving straight lines when pulling up the tape. I’m so glad I took the extra time to do this step. It made all the difference.

painting-laminate-furniture-emerald-green-pantone

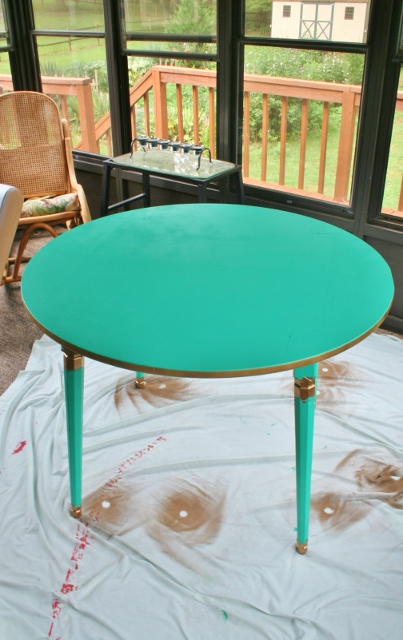
An hour or so later I then did two coats of the Emerald Green, letting the recommended 4 hour dry time between coats.

painting-laminate-furniture-emerald-green-pantone

painting-laminate-furniture-emerald-green-pantone

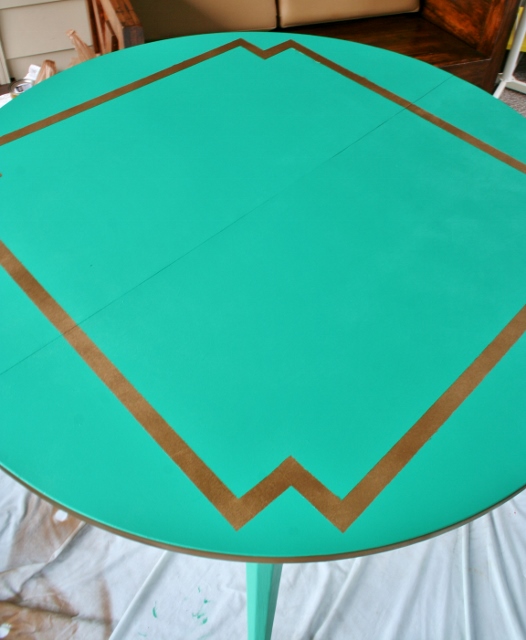
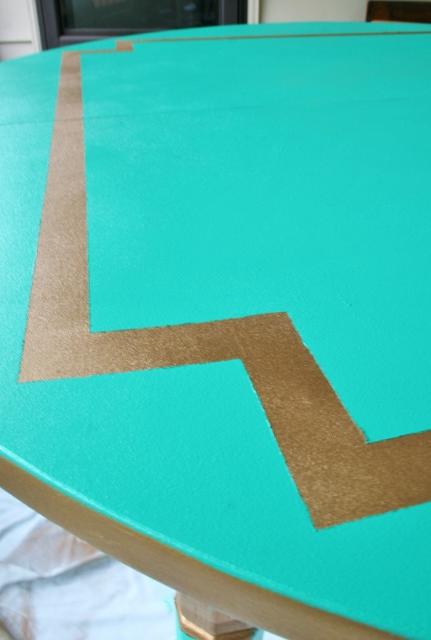
Then came the moment of truth when I started pulling up the tape, scared to see drips and smearing under the tape. But no! Doing it right works! My lines were perfect and straight, except for where the latex pulled up a little. That’s not that big a deal as you can usually just press it down back into place.

painting-laminate-furniture-emerald-green-pantone

painting-laminate-furniture-emerald-green-pantone

painting-laminate-furniture-emerald-green-pantone

I giggled. I danced. I did my happy dance. I absolutely love this table! It’s everything I wanted it to be and more!

The last step was putting two coats of polyurethane on it (I used Minwax in Satin). This is actually where I ran into a little of trouble. The spray painted area reacted a little differently than the latex and it actually “melted” under it, causing it to run. So I steered clear of that and just put it on the green. I’m still contemplating getting a spray can of poly to see if that would work for both types of paint. Even without that I’m pleased with the finish.

painting-laminate-furniture-emerald-green-pantone

painting-laminate-furniture-emerald-green-pantone

painting-laminate-furniture-emerald-green-pantone

painting-laminate-furniture-emerald-green-pantone

painting-laminate-furniture-emerald-green-pantone

painting-laminate-furniture-emerald-green-pantone

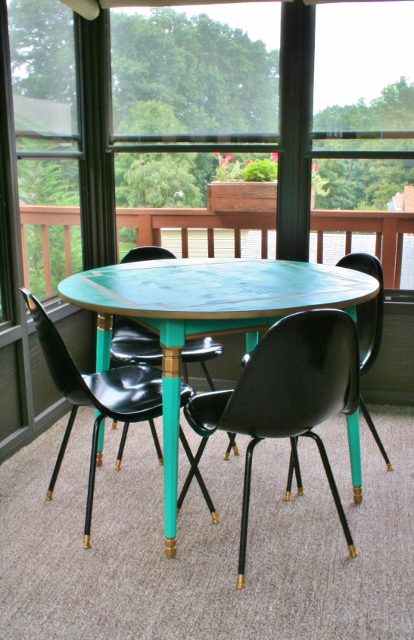
Look at how amazing it looks all together with the chairs. I’m over the moon with happiness on how the sun room is all coming together! This may be one of my favorite projects I have ever done (do I say that every time?!). What about you? What have you been painting recently?

Sharing This Project: